
Ever wondered how to create a rich, velvety corn bisque soup that’s perfect for chilly evenings or elegant dinner parties? If you love the sweet, natural flavor of corn combined with a smooth, creamy texture, then you’re in for a treat! Today, I’ll walk you through everything you need to know—from selecting the best ingredients to mastering the cooking process—so you can make a delicious, restaurant-quality corn bisque at home.
In this comprehensive guide, I’ll cover not just the basic recipe but also tips for success, common mistakes to avoid, and some exciting variations to spice things up. Let’s dive into this creamy corn bisque adventure!
What Is Corn Bisque Soup?
Before we get into the nitty-gritty, let’s clarify what exactly corn bisque is. Simply put, bisque is a smooth, creamy soup traditionally made from shellfish or vegetables, blended to a velvety consistency. When you add fresh or frozen corn into the mix, it becomes a delightful corn bisque—rich in the sweet flavor of corn and silky in texture.
Definition List:
| Term | Explanation |
|---|---|
| Bisque | A thick, creamy soup made by pureeing cooked vegetables or seafood, often enriched with cream or butter. |
| Corn Bisque | A variation of bisque that features fresh or frozen corn as the main ingredient, resulting in a sweet, savory, and smooth soup. |
| Velvety Texture | A term describing a smooth, creamy mouthfeel achieved by blending and simmering the ingredients to perfection. |
Why Make Corn Bisque?
- Flavorful and Versatile: Perfect as an appetizer or a light main course.
- Nutritious: Packed with fiber, vitamins, and antioxidants from fresh corn.
- Elegant: Looks beautiful in bowls and makes a great impression.
Now that you know what corn bisque is and why it’s worth making, let’s move on to the ingredients and materials you’ll need.
Materials Needed
Here’s a detailed table to help gather everything for this recipe:
| Item | Quantity | Notes |
|---|---|---|
| Fresh corn cobs or frozen corn | 4-5 cups | Fresh corn provides the best flavor; canned works too but less flavorful. |
| Onion | 1 medium | Finely chopped. |
| Celery stalks | 2 stalks | Adds depth to the base. |
| Garlic cloves | 3 cloves | Minced for aroma. |
| Butter | 4 tablespoons | Adds richness. |
| Olive oil | 1 tablespoon | For sautéing. |
| Chicken or vegetable broth | 4 cups | For simmering and blending. |
| Heavy cream or coconut cream | 1 cup | For creaminess (optional but recommended). |
| Salt and black pepper | To taste | For seasoning. |
| Fresh herbs (optional) | Parsley, thyme | For garnish and flavor. |
| Paprika or cayenne | Optional, for heat | Adds a smoky or spicy touch. |
Tips for Choosing Ingredients:
- Use fresh, sweet corn for the best flavor. If you’re out of season, frozen corn is a good substitute.
- For a dairy-free version, swap heavy cream with coconut milk or almond cream.
- Fresh herbs like thyme or parsley really elevate the soup’s flavor.
Now, let’s get into how to actually make this delicious corn bisque step-by-step.
Steps to Make Corn Bisque Soup
1. Prepare the Corn
- If using fresh corn: Husk the corn and cut the kernels off the cob. Set aside.
- If using frozen corn: Thaw the corn in the fridge or microwave.
2. Sauté Aromatics
- In a large pot, heat the olive oil and 2 tablespoons of butter over medium heat.
- Add chopped onion and celery. Sauté until translucent, about 5-7 minutes.
- Add minced garlic and cook for another 1 minute until fragrant.
3. Cook the Corn
- Stir in the corn kernels and cook for about 5 minutes, letting the flavors meld.
- Optional: Reserve a handful of corn kernels for garnish.
4. Add Broth and Simmer
- Pour in the chicken or vegetable broth.
- Bring the mixture to a boil, then reduce heat and let it simmer for 15-20 minutes.
- The corn should be tender at this point.
5. Blend the Soup
- Use an immersion blender directly in the pot to blend until smooth and velvety. Alternatively, transfer the mixture in batches to a blender and puree until smooth.
- Return the pureed soup to the pot.
6. Enrich and Season
- Stir in the remaining 2 tablespoons of butter and the heavy cream.
- Season with salt, pepper, and optional paprika or cayenne for a touch of spice.
- Simmer for another 5 minutes to meld the flavors.
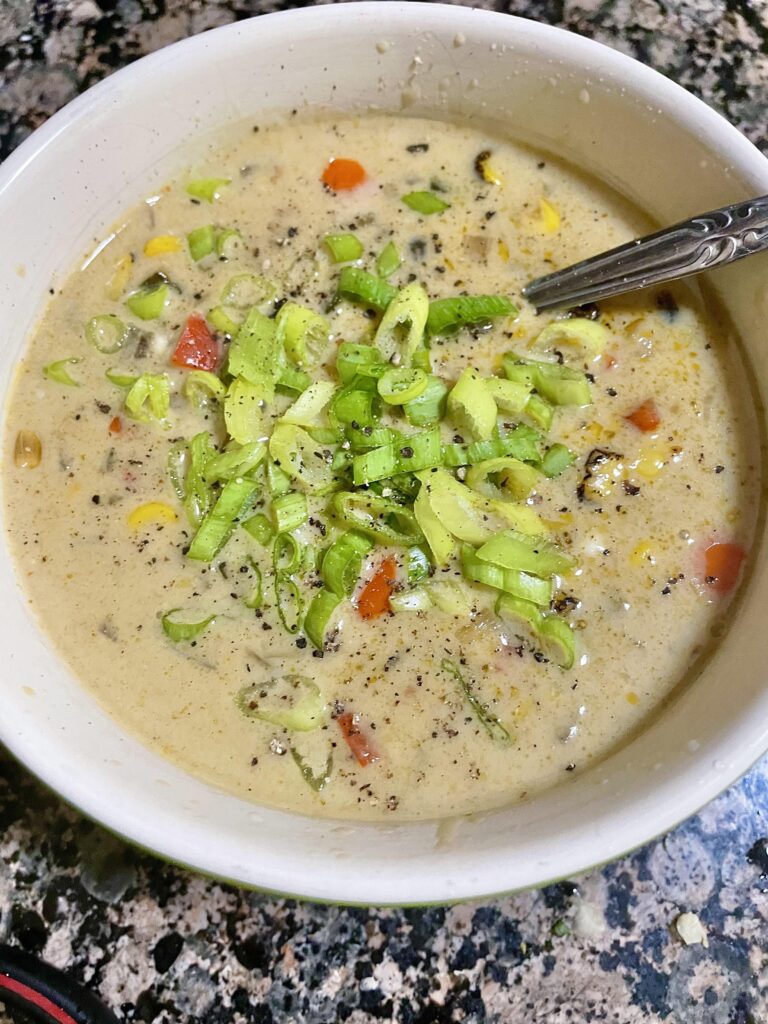
7. Serve and Garnish
- Ladle the hot soup into bowls.
- Garnish with reserved corn, fresh herbs, and a drizzle of cream if desired.
Tips for Success
- Don’t skip sautéing: This step develops flavor and gives depth to the soup.
- Blend thoroughly: Ensures a silky, smooth texture without graininess.
- Adjust sweetness: If the soup isn’t sweet enough, a teaspoon of sugar can balance the flavors.
- Add acidity: A splash of lemon juice or apple cider vinegar brightens the soup.
Common Mistakes and How to Avoid Them
- Over-blending: Blending too long can make the soup slimy. Blend until smooth but stop immediately once achieved.
- Using only canned corn: Canned corn has a duller flavor; supplement with fresh or frozen corn when possible.
- Ignoring seasoning: Proper seasoning enhances sweetness and balances richness. Taste as you go.
- Not straining if desired: For an extra-smooth soup, strain through a fine mesh sieve after blending.
Variations to Try
- Spicy Corn Bisque: Add chopped jalapeños or chili powder.
- Cheesy Corn Bisque: Stir in shredded cheese like cheddar or Parmesan.
- Vegan Version: Use coconut cream and vegetable broth, omit butter or replace with olive oil.
- Add Protein: Incorporate cooked shrimp or chicken for a heartier meal.
- Herb-infused: Garnish with fresh basil, cilantro, or chives.
In conclusion, making a delicious corn bisque is easier than you might think. With fresh ingredients, the right technique, and a pinch of creativity, you can enjoy a silky, flavorful soup right in your own kitchen. Happy cooking, and I hope your next bowl of corn bisque turns out absolutely perfect!
Remember: Good flavor starts with quality ingredients and care in preparation. So, gather your materials, follow the steps, and enjoy the cozy goodness of homemade corn bisque soup!
Enjoyed this recipe guide? Don’t forget to experiment and make it your own! Happy cooking!